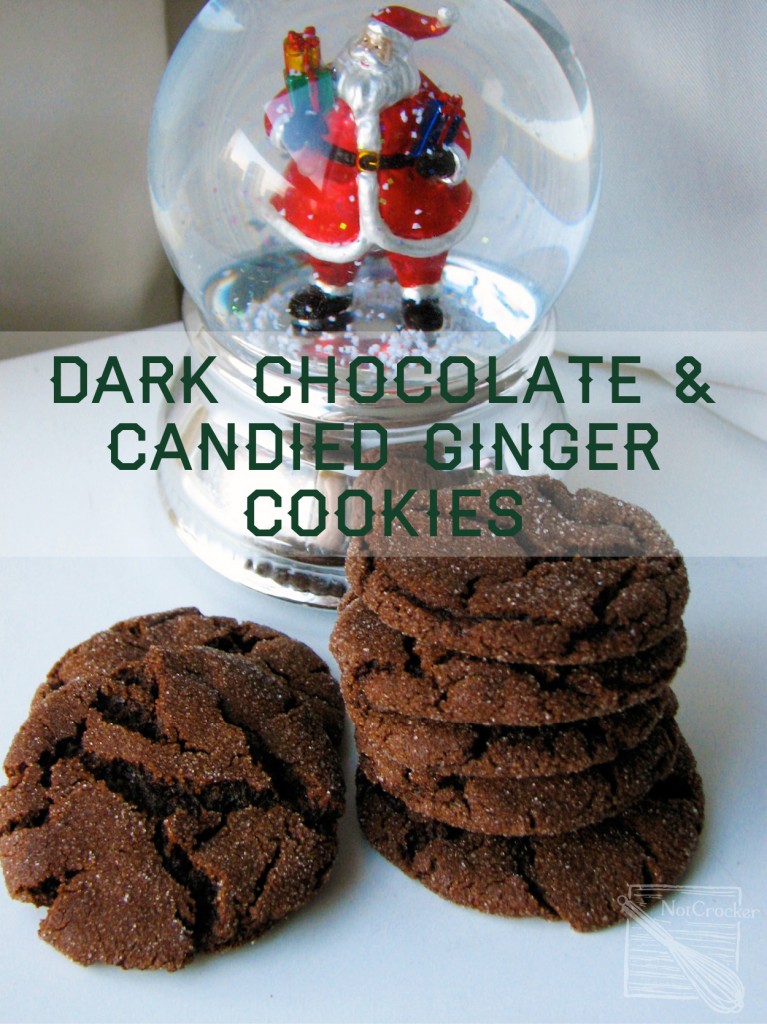
Dark Chocolate & Candied Ginger Cookies for the Great Food Blogger Cookie Swap!

It’s that time of year again, cookie swap time! I was so thrilled to participate in The Great Food Blogger Cookie Swap last year, so of course I hustled to sign up again this year. There is nothing I love more than seeing what other bloggers create and also hearing if they’ve enjoyed my creations!

It was my absolute pleasure to send a batch of these to Gastronomical Sovereignty (soon to be She Eats)Peanut Butter and Onion, and the Savour Sisters. Check out these lovely blogs and help support incredible Canadian Food Bloggers! Of course, food bloggers from around the world participated, and I will post a link to the full list when it is posted on Monday!

Sadly, I have only received two of my three swap batches, but that’s alright because those I did receive we FANTASTIC! Further to this sadness though is that I promptly lost both the cards from both the batches that I did receive so I am going to keep an eagle out for their recipes so I can properly link to them and thank them here. I figured one out!

First, from Sweet Twist of Baking, I received delicious espresso short bread with dried cherries and almonds, which I ate with tea and coffee. They were so buttery and just lightly sweet that they felt appropriate for first thing in the morning… and in the afternoon… and before I went to bed. The other batch were sugar cookies (I believe… I am terrible at naming cookie types). They were thin but sturdy with a good bite. The icing on top was PERFECT, with little silver dragees for sparkle and crunch. These also got promptly gobbled up with tea and coffee. So, thanks to those two wonderful bloggers who I promise I will name when I a) hear from you; b) hunt down your recipe; c)find your cards.

ChocolateGingerCookies

Continue reading

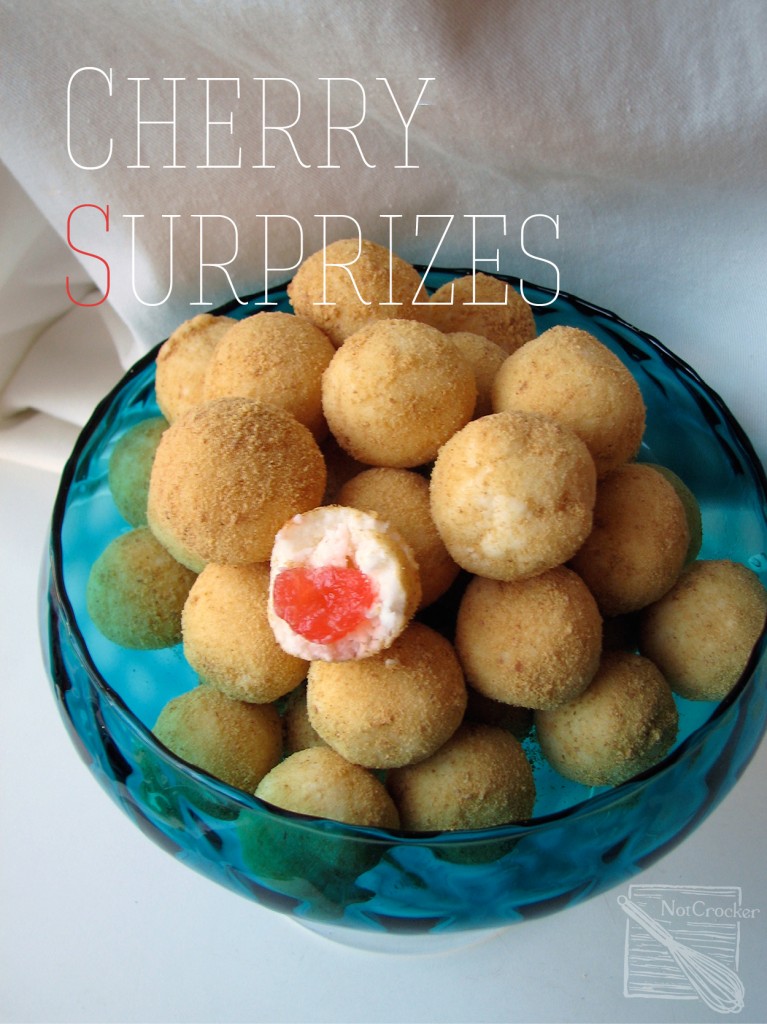
Family Classic: Cherry Surprizes

Oh goodness, it has been a long time since I’ve posted! Not for lack of baking, it’s been a busy baking season, so I have loads of posts coming up. I love the Christmas season, I’ve had a lot of stuff going on, including going to the Stuart McLean Christmas show last weekend, which was absolutely lovely. At work we’ve implemented an awesome Christmas Calendar of fun. Last week I was responsible for Cookie Wednesday, my offerings are pictured below the recipe (the other cookies and bars picture will come up later this week) and on friday, Kat and Kathryn brought in hot chocolate and Baileys which made for an indulgent morning. To add to my Christmas joy, we had a Christmas/winter-themed trivia night with the NFB-Bads at Teri and Brian’s apartment which was incredibly fun. And finally, to make the week full of joy, Karen, Kat and myself lunched at the Vancouver Christmas Market, which is a German market. Awesome!

Also, I rearranged our tiny little living room to accommodate the Christmas tree, and it makes the space look huge! Huzzah!

CherrySurprizes

Continue reading

Make your own Cranberry Sauce!

CranberrySauce

Once again, we’ve come around to making something homemade rather than buying it. The things I prefer to make than buy: Mayo, Eggnog, Taco Spice mix, Dry Rub, Curry blend, Sausage spice, Bacon Jam, Beer Bread, Pita and every baked good ever.

Homemade cranberry sauce can be tweaked to your desire, but really, those freshly burst berries are awesome anyway you go about it. Dollop on a plate piled with Turkey or Tofurkey and your night is set.

Cranberry Sauce

INGREDIENTS

  • 2 cups cranberries (use wild berries if you can, but those gargantuan ones in the store will do too)
  • 1 cup orange juice
  • 1 cup sugar

DIRECTIONS

  1. In a saucepan over medium heat, stir the sugar into the orange juice. Heat until the sugar disolves.
  2. Stir in the cranberries, and cook uncovered until they begin to burst, about 10 minutes.
  3. Remove from heat, and allow to cool.
  4. The sauce will thicken as it cools, if it seems too thin put it back on the heat for 5 minutes and allow to cool again.
  5. Serve!
Giant berries.

Giant berries.

Bursting with deliciousness.

Bursting with deliciousness.

Eggnog from scratch a totally-worth-it seasonal treat!

Eggnog

I only started making eggnog from scratch last year, when my mom suggested it. The glory of homemade eggnog is that you know what goes into it, you can adjust the sweetness and the thickness, and it is pretty darn simple. I really like eggnog, despite having a terrible (albeit not as bad as it could’ve been) experience in my first year of university: I was really sick in the last week of November/first week of December and had not left the house for a few days. Even though I wasn’t feeling 100% (I still couldn’t smell or really taste) I decided to leave the house with my roommate to pick up some groceries. I thought it would be nice to get a carton of eggnog as it was the season, so I picked up that, some milk and a few other things. It wasn’t until the next day, when my roommates were at a class they had together that I felt up for a glass of eggnog, I poured it out and mixed it half-and-half with skim milk (I find store-bought eggnog cloyingly sweet) and drank it up. I was sad as I still couldn’t taste anything. I left the unfinished glass on the coffee table and snoozed on the couch. When my roommates came home an hour later they were horrified by a rotten smell. Apparently the eggnog I had been drinking was completely rotten. I hadn’t noticed because I could neither smell nor taste, the texture didn’t seem weird (again though, I was really sick and a bit out of it). The smell was so bad that we stuck the carton outside to freeze. Thankfully I didn’t get sick and because I couldn’t taste or smell any of these events, was not traumatized out of my love of eggnog!
Anyway, this recipe is from Alton Brown (**cooking swoon). I have adapted it slightly to lighten it up, but have included his original recipe in square brackets. It is very delicious both ways, I just like to drink more of it without feeling over-riched. I also omit the alcohol in the initial batch, preferring to add it as it is served to those who want the booze, and as we all know The Kraken is a Not Crocker favourite for deliciously boozing up anything! Alton also offers tips on how to make a cooked version (for those afraid of raw eggs), I don’t think it’s necessary to cook it, but certainly do it if you are worried!

Last Christmas we drank a couple batches of this delicious stuff, this Christmas I was on constant eggnog duty, whipping up an impressive 13 batches (I made three triple batches and two double batches). This is also incredible served in coffee and as an ingredient in the eggnog pumpkin pie I baked up for dessert which will be posted later this week.

Enjoy!

Eggnog

Slightly adapted from Alton Brown’s delicious recipe, also check here for a cooked version.

Makes enough for 4 people, I recommend doubling or even tripling the batch if you have a container to keep it in (we cleaned out a milk jug which worked perfectly and allowed us to shake it well before stirring to redistribute the nutmeg and the frothiness).

INGREDIENTS

  • 4 egg yolks
  • 1/3 cup sugar, plus 1 tablespoon kept separate
  • 2 cups of partly skim milk, I’ve used both 1% and 2% [Alton calls for whole milk]
  • 1 cup heavy whipping cream
  • 1 tsp ground nutmeg [Alton calls for freshly grated, but I didn’t have this on hand and the nog was still excellent]
  • 4 egg whites

DIRECTIONS

  1. In a large bowl, beat the egg yolks until they lighten in color. Add the 1/3 cup sugar and continue to beat until it is completely dissolved. Add the milk, cream, and nutmeg and stir to combine.
  2. In a very clean bowl (preferably of a mixer) beat the egg whites to soft peaks. Add the tablespoon of sugar and continue to beat to stiff peaks. (If you have accidentally gotten some whites, water, grease, etc. in your bowl, your whites may not stiffen enough, that’s okay, beat them the best you can and continue on, the nog will be less frothy but no less delicious. Live and learn!)
  3. Whisk the egg whites into the milk and yolk mixture, chill and serve with a shot of spiced rum or brandy.
Lightened yolks. Scrape down the sides to fully dissolve the sugar.

Lightened yolks. Scrape down the sides to fully dissolve the sugar.

Cream and yolk mixture set aside, awaiting the whipped whites. This bowl was handy for us to pour the mixture into a container.

Cream and yolk mixture set aside, awaiting the whipped whites. This bowl was handy for us to pour the mixture into a container.

Gorgeous cloud of whites ready to fluff up this holiday nog.

Gorgeous cloud of whites ready to fluff up this holiday nog.

Cookie Swap Official Recipe! Hot Chocolate Sandwiches filled with Pink Peppercorn & Cardamom Marshmallows

HotChocolateCookies

I wanted to do something fancy for my contribution to the Great Food Blogger Cookie Swap. I mean really, it’s hosted by the wonderful Love and Olive Oil and The Little Kitchen. The blogs that participate are all filled with beautiful food, designs, and ideas. I have been craving hot chocolate lately and have begun to master the art of marshmallows, so it seemed like a cookie combo made in heaven. Also, I love cardamom and happen to have a bunch of different peppers on hand, so there we go!

Not to wax on about the cookies or the event, or any of that jazz… but I am SOOOOOooooo excited to be part of this. I know that part of building a great blog and following is networking with the community but I’ve been so busy the last 8 months that I haven’t really had a chance to develop those relationships. This is my first step of getting in there with the big, fancy blogs and wave my little Not Crocker flag, saying “Hello, I like to cook and bake too!” I hope that Bailey of Sugar Haven, Aimee of Aimee’s Oven, and Heather of New House New Home New Life liked them! I learned a lot, particularly that I was one sandwich short, so I baked up three icebox cookies to create the one ugly, franken-cookie in each batch… there has to be one… right? Merry Christmas Cookie Swap!

Something that I’d love to know, what is YOUR favourite Christmas treat? 

Quick note before baking, you will have to make the marshmallow in two batches so that it doesn’t totally firm up before you fill all the cookies.

Hot Chocolate Cookies

INGREDIENTS

  • 3 cups all-purpose flour
  • 3/4 cup cocoa powder
  • 3 oz dark chocolate, melted
  • 2 1/4 cup sugar
  • 1/2 tsp coarse salt
  • 1/2 tsp baking soda
  • 1 3/4 cup butter, softened
  • 1/4 cup heavy cream
  • 2 tsp vanilla

DIRECTIONS

  1. In a large bowl, whisk together the flour, cocoa, sugar, salt, and baking soda.
  2. Cut the butter into the flour mixture until you have a sandy texture with few lumps.
  3. Whisk together the melted chocolate, heavy cream, and vanilla until a sort of ganache forms. Drizzle the ganache into the dough and mix well to combine.
  4. Divide the dough in half. Knead the first half on a cutting board until it stick well together. Roll the dough into a log about 1 1/2 inches thick and wrap in wax paper. Do the same with the other log. Freeze the logs for 1 hour until very firm.
  5. Heat the oven to 350°F and line two cookie sheets with parchment paper.
  6. Using a very sharp knife, slice the log into 1/8- to 1/4-inch thick slices, keeping consistant. Place 1-inch apart on the prepared cookie sheets and bake for 12-15 minutes, turning halfway through.
  7. Cool the cookies on racks, they will crisp up as they cool down. You can definitely eat them all now, they are pretty tasty, but definitely hold off, make marshmallows, and make sandwiches!

Pink Peppercorn and Cardamom Marshmallows (make two batches to fill cookies)

Adapted from Pots and Pins recipe.

INGREDIENTS

  • 1 envelope of Knox unflavoured gelatin
  • 1/2 cup cold water
  • 1/4 cup water
  • 1/2 cup sugar
  • 1/4 cup light corn syrup
  • 1/8 tsp salt
  • 1/2 tsp pink peppercorns, ground
  • 1/2 tsp cardamom, ground
  • 1/2 teaspoon vanilla

DIRECTIONS

  1. In your large mixer bowl, sprinkle the gelatin over 1/2 cup cold water, set aside.
  2. Combine the remaining 1/4 cup water, sugar, corn syrup, and salt in a medium saucepan over medium-high heat.
  3. Bring mixture to a boil, allow to boil gently for 1 minute.
  4. Remove the syrup mixture from heat and stir in the vanilla, ground peppercorns, and cardamom.
  5. Briefly whisk the gelatin mixture on high speed. Gradually pour hot sugar syrup into the gelatin, beating on low.
  6. Once all of the syrup has been incorporated, increase the mixer speed to high and beat until the mixture is thick and shiny, 8-10 minutes.
  7. Move quickly and dollop 1 tablespoon of filling onto one cookie and top with another, pressing down enough to move the marshmallow to the edges. The marshmallow sets quickly, so don’t slow down. If it starts to set as you are filling, it will still work, it just wont look perfect.
  8. If you have extra marshmallow, pour it into a flat dish and cut up later for hot chocolates and coffees and snacking.

Massive Step-by-step

  1. In a large bowl, whisk together the flour, cocoa, sugar, salt, and baking soda.
  2. Cut the butter into the flour mixture until you have a sandy texture with few lumps.
  3. Whisk together the melted chocolate, heavy cream, and vanilla until a sort of ganache forms. Drizzle the ganache into the dough and mix well to combine.
  4. Divide the dough in half. Knead the first half on a cutting board until it stick well together. Roll the dough into a log about 1 1/2 inches thick and wrap in wax paper. Do the same with the other log. Freeze the logs for 1 hour until very firm.
  5. Heat the oven to 350°F and line two cookie sheets with parchment paper.
  6. Using a very sharp knife, slice the log into 1/8- to 1/4-inch thick slices, keeping consistant. Place 1-inch apart on the prepared cookie sheets and bake for 12-15 minutes, turning halfway through.
  7. Cool the cookies on racks, they will crisp up as they cool down. You can definitely eat them all now, they are pretty tasty, but definitely hold off, make marshmallows, and make sandwiches!

    Stacks of cooled cookies.

  8. In your large mixer bowl, sprinkle the gelatin over 1/2 cup cold water, set aside.
  9. Combine the remaining 1/4 cup water, sugar, corn syrup, and salt in a medium saucepan over medium-high heat.
  10. Bring mixture to a boil, allow to boil gently for 1 minute.
  11. Remove the syrup mixture from heat and stir in the vanilla, ground peppercorns, and cardamom.

    Well that doesn’t look like marshmallow!

  12. Briefly whisk the gelatin mixture on high speed. Gradually pour hot sugar syrup into the gelatin, beating on low.
  13. Once all of the syrup has been incorporated, increase the mixer speed to high and beat until the mixture is thick and shiny, 8-10 minutes.

    Oh, there it is!

  14. Move quickly and dollop 1 tablespoon of filling onto one cookie and top with another, pressing down enough to move the marshmallow to the edges. The marshmallow sets quickly, so don’t slow down. If it starts to set as you are filling, it will still work, it just wont look perfect.

Probably one of my best photos. Huzz-freakin-ah!

Again, check out the great blogs I got to connect with through this awesome cookie swap! They deserve lots of love:

Sent to:
Sugar Haven
Aimee’s Oven
New House New Home New Life

Received from:
Oven Adventures (sent amazing cinnamon chip cookies that smell like coziness)

I ♥ Fresh Food (sent vanilla chai short bread, delicious for dunking)

The Bacon Eating Jewish Vegetarian (it’s a mouthful, so are her delicious Cinnadoodles!)