Cookie Dough Bites- because sometimes you need a ridiculous treat

Hmm, what do I categorize these as? They aren’t cookies, they never make it that far… but they aren’t officially truffles, hmm. I will ponder on it.
Cookie dough bites have been on my mind since I saw them on Tastespotting, I love cookie dough, more than I love cookies, so they needed to happen. I changed nothing from the recipe, it is just delicious cookie dough heaven. Enjoy!

Cookie Dough Bites

Recipe from Cooking Classy (I only changed the chocolate chips and brown sugar for the things I have on hand/prefer)

Ingredients

  • 1/2 cup butter, softened
  • 3/4 cup packed dark brown sugar
  • 1/3 cup granulated sugar
  • 1/4 tsp salt
  • 3 Tbsp heavy cream
  • 1 tsp vanilla extract
  • 1 1/2 cups all-purpose flour
  • 1/2 cup semi-sweet chocolate chips, chopped (the idea is to get them to be about 1/2 – 1/3 their original size)

Directions

  1. In a medium bowl, whip together butter, brown sugar, granulated sugar, and salt until pale and fluffy.
  2. Stir in cream and vanilla extract. Add in flour and mix just until combined (dough will seem dry at first but it will come together). Stir in chopped chocolate chips.
  3. Scoop dough out 1 equal tablespoon at a time and roll into balls. Place on parchment or wax paper.
  4. Store in refrigerator in an airtight container.

These look huge but trust me, that bowl is tiny! It is a bowl for ants!

Brown Butter Cupcakes with Dark Chocolate Swiss Meringue Buttercream

The title is a mouthful and a bit misleading because while my intention was to make dark chocolate swiss meringue, it turned into more of a dark chocolate-kissed swiss meringue buttercream drizzled with dark chocolate. In any case, these are my favourite whiteish cupcakes topped with a fluffy cloud of buttercream. Neither the cake nor the buttercream are super sweet so this makes for a fantastic bite.

Brown Butter Cupcakes

Recipe from here.

Ingredients

  • 1 cup butter
  • 2 1/2 cups flour
  • 2 1/4 tsp baking powder
  • 1/4 tsp salt
  • 2 cups sugar
  • 4 eggs, room temp
  • 1 cup room-temperature milk
  • 1 1/2 tsp vanilla

Directions

  1. Use the cup of butter to make brown butter as per this post. Allow your browned butter to cool while you start the rest.
  2. Preheat oven to 325°F and prepare your cupcake tins with liners. (if using full-sized cupcake tins, preheat to 350°F)
  3. Combine the flour, baking powder, and salt in a medium bowl. Set aside.
  4. In a large bowl, beat sugar and eggs until fluffy and pale, about a minute. Add milk, browned butter, and vanilla, mixing until just combined.
  5. Add half of the dry mixture and beat, again, until just combined. Repeat with the second half. Don’t overmix, this is the key.
  6. Divide batter amongst liners and bake for 15-20 minutes (18-22 mins, if making full-sized cupcakes), until tops are springy to the touch or a toothpick poked into the center comes out clean. Start checking at 10 minutes as mini-cupcakes bake quickly.
  7. Cool tins on a rack for 2 minutes before carefully removing the cakes. Allow to cool completely before frosting (this will be 5 minutes if you made mini cupcakes, they take no time at all to cool).

Ready for the oven.

Fresh out of the oven!

Topped with my first attempt at Swiss Meringue Buttercream and drizzled with dark chocolate!

Swiss Meringue Buttercream (easier than it sounds, don’t be afraid of the curdle!)

So, I have my favourite regular buttercream recipe, Dreamy Buttercream, but I’ve wanted to try swiss meringue buttercream ever since I saw Sweetapolita‘s  (ugh even the name is great!) tutorial. Her tutorial makes this fluffy, cloud of an icing seem simple and less scary. And it was only with her encouragement that I managed to pull this off. So here is the recipe, my additions, my experience, and my mini-tutorial. The results can be seen in the next post, as the topping for my Brown Butter Cupcakes.

Satiny, glorious swiss meringue buttercream!

Swiss Meringue Buttercream

See Sweetapolita’s recipe and tutorial here!

Ingredients (this makes 15 cups, my measurements for 1/4 of the recipe follow each ingredient)

  • 16 large egg whites (4 large egg whites)
  • 4 cups white sugar (1 cup white sugar)
  • 5 cups of unsalted butter, softened but cool, cut into cubes (1 1/4 cups unsalted butter)
  • 2 tbsps pure vanilla extract (1 1/2 tsp vanilla)
  • 1/4 tsp salt (tiny pinch o’salt)
optional extra
  • 200gr dark chocolate (I used 70%)

Directions

  1. Wipe the bowl of an electric mixer (or just a metal bowl if you are mixerless, though this is WAY easier with a mixer),  whisk attachment, and whisk with paper towel and lemon juice (or vinegar), to remove any trace of grease.
  2. Add egg whites and sugar to the metal bowl,  and simmer over a pot of water (not boiling), whisking constantly but gently, until the sugar has completely dissolved and the egg whites are hot (smoosh some between your fingers, if it is smooth, no granules, you are good).
  3. Take off of stove, and begin to whip (with the mixer or by hand)until the mixture is thick, glossy, and neutral (you can feel outside of the bowl to test temperature, this takes some time).
  4. Switch over to paddle attachement, or a good spoon, and, while mixing continuously on low speed, add butter one cube at a time until incorporated.
  5. Mix until it has reached a silky smooth texture.
  6. Add vanilla and salt, mix well. You can also add a wide variety of flavourings, extracts, and more. If buttercream is too runny, the butter was possibly too soft–place into the refrigerator for about 15 minutes, then beat again. If still too runny, add a few more cubes of butter and keep beating until it reaches Use immediately, or refrigerate/freeze.

Picture tutorial time!

Whipping the meringue. Dig in, this stuff is glorious!

  1. Wipe the bowl of an electric mixer (or just a metal bowl if you are mixerless, though this is WAY easier with a mixer),  whisk attachment, and whisk with paper towel and lemon juice (or vinegar), to remove any trace of grease.
  2. Add egg whites and sugar to the metal bowl,  and simmer over a pot of water (not boiling), whisking constantly but gently, until the sugar has completely dissolved and the egg whites are hot (smoosh some between your fingers, if it is smooth, no granules, you are good).
  3. Take off of stove, and begin to whip (with the mixer or by hand)until the mixture is thick, glossy, and neutral (you can feel outside of the bowl to test temperature, this takes some time).

    Adding butter.

  4. Switch over to paddle attachement, or a good spoon, and, while mixing continuously on low speed, add butter one cube at a time until incorporated.

    AHH curdling! It’s alright, now is the time to save it! It’s easy!
    Just put the bowl in the fridge for 10 minutes, pop it back in the mixer and get to work. It took about 10 minutes of low, slow mixing for it to come together but it was totally worth it!

  5. Mix until it has reached a silky smooth texture.

    It’s hard to tell, but it is finally coming together here, everything is fluffing up, smoothing out, and making heaven.

  6. Add vanilla and salt, mix well.  Use immediately.
  7. If you are adding flavourings, do it at the end. Replace the vanilla with another extract. OR, do as I did, melt 200gr of dark chocolate and allow to cool. Drizzle the chocolate into the buttercream while it is on low. Top your mini cupcakes and then drizzle with an additional bit of melted dark chocolate that has been thinned slightly with some shortening.

Yogurt Coffee Cake Muffins

Another mouthful for a title but oh so worth it. These muffins were inspired by laziness. I had already planned to bake coffee cake this weekend but decided this morning that I really didn’t want to bake a pan of coffee cake, have to cut it and store it and figure all that out. Muffins are easier to manage, I can eat two or three and Gen can’t tell how much I’ve eaten… fool proof plan. These are light and fluffy with a bit of a crunch, and a golden top that cries to be save until the end (Seinfeld knew what was up with the whole Top of the Muffin thing).

Yogurt Coffee Cake Muffins

Adapted from this lovely cookbook.

Ingredients

Crumb top

  • 3/4 cup all-purpose flour
  • 3/4 cup firmly-packed dark brown sugar
  • 1/2 tsp salt
  • 1 cup toasted walnuts (place on baking sheet in a 375° for 5-10 minutes, until they start to brown)
  • 6 tbs unsalted butter, cold, cut into 1″  cubes

Chocolate sugar ribbon

  • 1/2 cup dark brown sugar
  • 1 tsp cocoa powder
  • 1/2 tsp cinnamon
  • 1/4 tsp cardamom
  • 1/4 tsp nutmeg

Cake

  • 1 cup butter, softened (not melted)
  • 2 1/4 cups sugar
  • 4 large eggs
  • 2 cups of plain yogurt
  • 1 1/2 tsp vanilla
  • 3 1/2 cups  all-purpose flour
  • 1 tsp baking powder
  • 1 1/2 tsp baking soda
  • 1/2 tsp salt

Directions

  1. Crumb top prep: Whisk together the flour, sugar, and salt. Add the toasted walnuts and, using a pastry cutter, chop the walnuts into the flour mixture until they are well incorporated and in pea-sized pieces. Add the butter, again using the pastry cutter, cut the butter into the mixture until everything is finely chopped, resembling coarse sand. Cover with plastic wrap and set aside in the refrigerator.
  2. Sugar ribbon prep: In a small bowl, whisk together the sugar, cocoa powder, cinnamon, cardamom, and nutmeg and set aside.
  1. Preheat the oven to 350 degrees F. Line or grease muffin tins. (This made 24 muffins exactly, I only have one tin so I had to put them in twice.)
  2. In a large bowl, cream the butter until smooth. Scrape down the sides and add the sugar. Mix until smooth and starts to look fluffy.  Add the eggs, one at a time, mixing well after each and scraping the sides as needed.
  3. Add the yogurt and vanilla and mix until just incorporated. Whisk together the flour, baking powder, baking soda, and salt. Add the flour mixture in three parts until just incorporated. Be careful not to overmix.

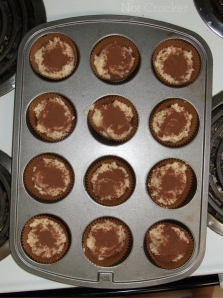
    Swirl layer.

  4. Drop one tablespoon of batter into each cup.  Cover with a tsp (or more) of the sugar ribbon mixture.
  5. Drop a heaping tablespoon of batter on top of the sugar ribbon layer and smooth as best you can. Top with the crumb topping and press down into the batter. Don’t be afraid to use a lot of topping, you wan to use it all.
  6. Bake for 20-25 minutes, until golden brown or a toothpick inserted in the center comes out clean. Let cool on a wire rack.

All the mixins ready to layer!

Ribbon of goodness.

Chocolate Chip Peanut Butter Banana Muffins

This is Kel’s first recipe. I was going to wait until she had a chance to post her commentary on these muffins, but she is a busy lady, and these are the perfect post for a Sunday morning, so here we go! I have had versions of these muffins, and I can assure you that they are delicious, the peanut butter and banana are doing their own delicious thing and then in jumps the chocolate, and well, as you can imagine, it is like a tasty tango. Kel might jump in here at a later point to add her commentary, but I will say that these are yummy.

Chocolate Chip Peanut Butter Banana Muffins

Ingredients

  • 2-1/2 cups all-purpose flour
  • 1/2 cup sugar
  • 1/2 cup packed, golden brown sugar
  • 1 Tablespoon baking powder
  • 3/4 teaspoon salt
  • 1/4 teaspoon cinnamon
  • 2-3 large, ripe bananas, mashed-enough for 1-1/4 cups banana
  • 1 cup milk
  • 3/4 cup smooth peanut butter
  • 3 Tablespoons canola oil
  • 1 teaspoon vanilla
  • 1 large egg
  • 1 cup semi-sweet chocolate chips

Directions

  1. Preheat oven to 375°F.
  2. In large bowl, whisk together flour, both sugars, baking powder, salt, and cinnamon.
  3. In separate bowl, combine mashed bananas, milk, peanut butter oil, vanilla, and eggs. Pour over dry ingredients. Add chocolate chips and stir until just combined.
  4. Spoon into greased or paper-lined muffin tin, filling each three-quarters full. Bake until tops are firm to the touch, about 20 to 25 minutes. Let cool in pan on rack for 5 minutes; transfer to rack and let cool.