
Ah sweet, sweet health recovery! I am not back to 100%, but a lot closer than the beginning of the week. I hope you Americans had a wonderful Fourth of July, independence, tea, etc. etc.! It is Latincouver on Granville St today and tomorrow the air is filled with the sounds of summery good times. Reminds me of the Salsa Fest that Calgary has every year in the neighbourhood we lived in, Kensington. The Salsa Fest in Calgary was not about dancing it was about a ton of restaurants and stores and mayoral candidates coming out to compete with their best salsa recipes! You brought your own chips and just cruised the two main streets, chowing down on tons of creative salsas. Don’t get me wrong, there was some salsa dancing going on and definitely salsa music, but it was all about the food!
Tag Archives: salad
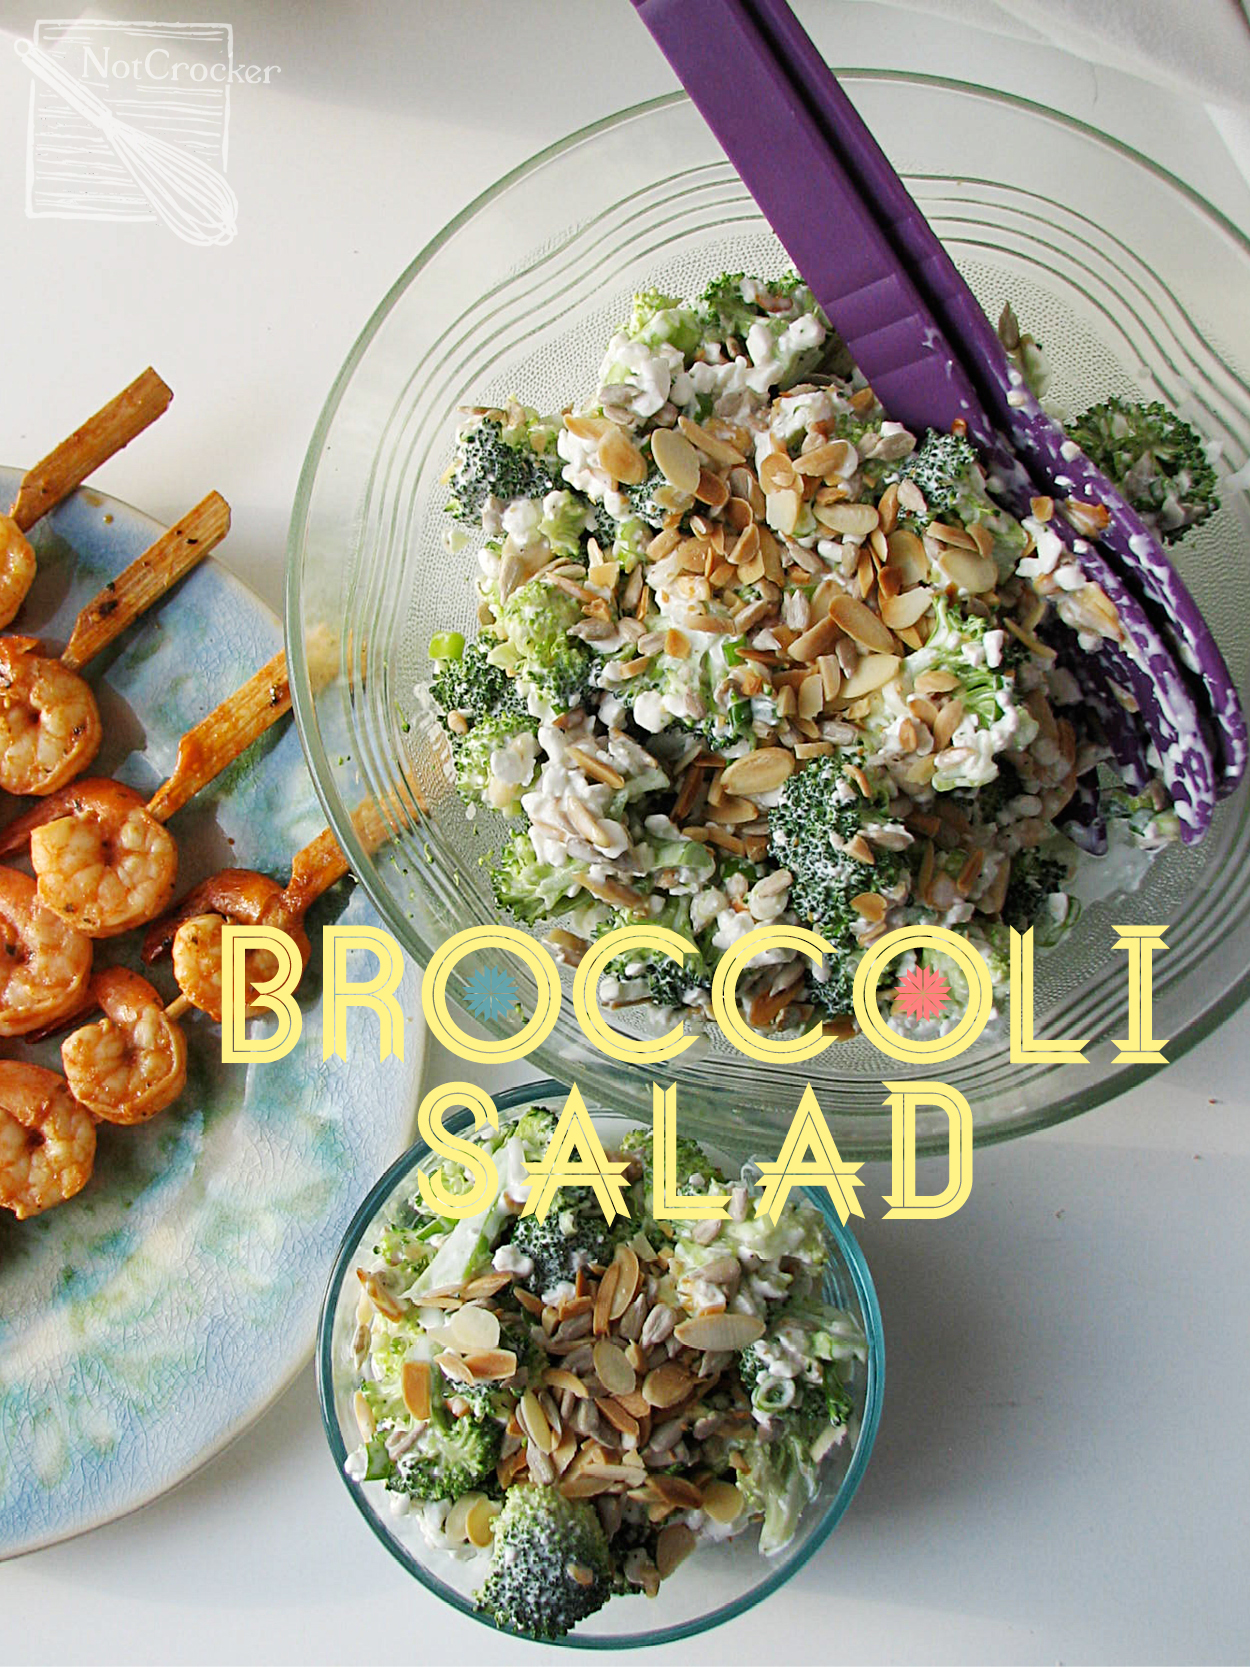
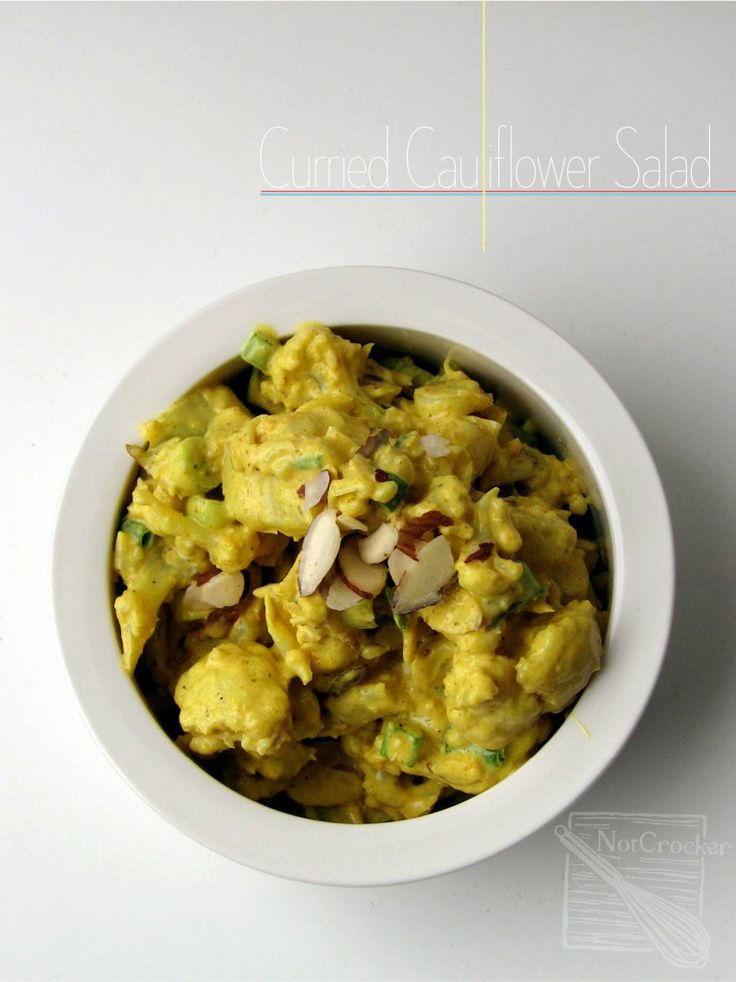
Curried Cauliflower Salad
My mom was here for a visit all this past week and we had a wonderful time tooling around the city, eating out at some lovely restaurants and just generally enjoying each other’s company. Mom proved invaluable at trivia, answering lanolin and others correctly, though let it be known that she was unable to produce Princess Diana’s maiden name. She fell in love with Game of Thrones, bought two pairs of shoes, and bought us a lovely bouquet of tulips. Mom seemed content to sleep on our ancient couch but was very troubled by our loose toilet seat. I have also been troubled by the loose toilet seat but found it was easier to strategically sit than to try to figure out the best way to go about fixing it. After work on Friday, after mom had left for Whitehorse, I set about tightening the toilet seat bolts.
It should be known that the toilet is already kind of strange. It is a low-flow toilet that has two buttons, one for the little stuff and one for the big. It is all one piece, the tank is part of the whole. And the frigging seat is a slow-close miracle that is unlike all the diagrams that I have looked at online (yes, I researched proper toilet seat tightening protocol). So, Friday after work I set about tightening the darn seat. I had studied the diagrams and understood the mission. Find the caps near the hinges, pry them off, use my pliers to tighten the bolts, replace the caps, and voila, a sturdy sitting experience. No such luck. I stared at the seat, perplexed by the lack of caps that EVERY toilet seat tutorial made mention of. OK, new strategy, pry the seat off the obviously hidden caps, right? No. Some desperate tugging, prodding, crying, and excessive (or not) hand washing later, I was back at the computer trying to figure out how to solve this mystery. I Googled, “slow close toilet seat fixing no caps” and many variations of that general combination of words but all the tutorials suggested that there should either be caps or an easy-release button somewhere in the general vicinity of the hinges. But our toilet seat is smooth with no visible access points. I squeezed the sides in an attempt to release it, I gently and not-so-gently tugged at it, I peaked into the bowl to see if the bolts were accessible from there, I started to cry. I was so frustrated at the seemingly impossible task of tightening the frigging toilet seat that I sat at my computer, staring at pictures that did not look like my toilet seat, and just cried. Then, an hour or so after starting this ridiculous journey, I marched into the bathroom, slapped my hand on the side of the bowl and felt a frigging bolt. Reaching around the other side I found the matching bolt and realized that I had not looked in the most obvious place, the outside of the bowl. A quick couple of turns on the plastic nuts and the seat was secure. I washed my hands and forearms (I felt too close to the toilet not to) and schlumped on the couch, totally embarrassed that I let a toilet seat bring me to tears.
It’s hard to segue from a toilet story to a recipe, but it must be done.
This salad is pretty amazing. (Smooth transition, right?)
Massaged Kale Salad

This recipe was sent to me some time ago by our wonderful friend Evi. She always sending me delicious recipes and I finally got around to making this one! I am sure I’ve mentioned it before, but I love kale, so does Gen. So finding new ways to integrate it into our diet is always great! This salad is super simple. Really, it is 5 or so ingredients, and a few minutes of your time. I’ve actually come to the conclusion that this would be a wonderful way to start an even more complex salad, a great way to integrate the benefits of avocado for the Apple Dijon Kale Salad. Really, the possibilities are endless and this is both an awesome salad on its own and really snazzy jumping-off point for many delicious variations.
Massaged Kale Salad
Adapted from The Wannabe Chef.
INGREDIENTS
- 2 cups kale, roughly chopped
- 1 large avocado
- juice of 1/2 lemon or lime
- 2 stalks of celery, diced
- 2 green onions, diced
- 1 medium tomato, diced (optional, we didn’t have any at the time, still turned out delicious)
- pinch of cayenne pepper (optional)
- 1/4 tsp sea salt
- pinch of black pepper
DIRECTIONS
- In a large bowl, toss the kale with your lemon juice.
- Cut the avocado up and plunk onto of kale.
- Remove any finger jewelery… it’s about to get messy.
- Massage the avocado into the kale for 5-8 minutes, until the kale is evenly coated in avocado and looking vibrantly green.
You are looking to essentially mash the avocado into the kale leaves. - Toss in your onions, celery, and tomato. Sprinkle with salt, pepper, and cayenne (if using).
- Serve alongside something hearty.

Pre-avocado rubdown!

The terrible final image of a very tasty salad.
Stuffed Shells & Apple Dijion Kale Salad

This meal rocks. I know that is tooting my own horn, but seriously, this is good eats. Gen, when he came home at 11pm and took a bite of the cold leftovers, said, “This is better than most restaurant food.” Not loving the “most,” but I’ll take it! The stuffed shells are cozy, warm, downhome eats. The salad is bright, tangy, and texture-rich. Awesome combo that I will surely make again. Once again, I found the salad on the wonderful Budget Bytes and made very slight adjustments. While most recipes for stuffed shells call for spinach, I LOVE Swiss chard, and it was on sale, so I used it instead. It adds a little sweetness and a nice variety of colour to the dish. Also, the step-by-step is PACKED with pictures… just a warning.
Stuffed Shells
Adapted from a Canadian Living recipe.
INGREDIENTS
- 2 tbsp olive oil
- 1 1/2 lb ground beef
- 3 small (or 1.5 large) red onions, finely chopped
- 6 cloves garlic, minced
- 1 1/2 tsp dried basil
- 1 1/2 tsp oregano
- 1/2 tsp crushed red pepper flakes
- 1/2 tsp salt
- 1/4 tsp pepper
- 1 can (28 oz/796 mL) diced tomatoes
- 1 can (28 oz/796 mL) tomato sauce
- 1 box jumbo pasta shells (these were hard to find, I had to hit up 4 grocery stores… I was worried I’d have to stuff tiny little shells)
- 1 cup shredded mozzarella cheese
- 1/4 cup grated Parmesan cheese
- 2 bunches (about 10 leaves) of Swiss chard (I used both the white and red versions)
- 1 cup grated Parmesan cheese
- 1 cup shredded mozzarella cheese
- 1/4 cup chopped fresh parsley
- 4 green onions, chopped
- 2 eggs, beaten
- 1 tsp dried basil
- 1/4 tsp ground nutmeg
- 1/4 tsp pepper
- 1 tub (475g) ricotta cheese
DIRECTIONS
- Preheat oven to 350°F
- In large pan, heat half of the oil over medium-high heat; cook beef, breaking up with spoon, for 8 minutes or until no longer pink. Drain fat, and remove meat from pan. Set aside.
- Trim your Swiss chard, removing the tips of the stems and any brown spots. Rinse the chard and cut/tear into quarters. Steam the chard until tender, about 10 minutes. Place steamed chard onto a tea towel to dry a bit.
- Add remaining oil to pan; sauté the onions and garlic for 5 minutes. Add basil, oregano, hot pepper flakes, salt, pepper, tomatoes, and tomato sauce. Return beef to pan; bring to boil. Reduce heat and simmer, stirring often, for 20 to 25 minutes or until thickened.
- Meanwhile, in large pot of boiling salted water, cook pasta according to package directions until tender but firm. Drain and rinse under cold water; drain well and place on damp tea towel.
- Filling: Meanwhile, in a large bowl, combine steamed Swiss chard, ricotta, Parmesan, mozzarella, parsley, onions, eggs, basil, nutmeg, and pepper.
- Pour half of the tomato-meat sauce into 13 x 9-inch casserole dish. Spoon heaping tablespoons of filling into each pasta shell. Arrange snugly, stuffed side up, in dish. Spoon remaining sauce over top; sprinkle with mozzarella and Parmesan cheeses. Cover with foil.
- Bake covered for 30 minutes. Uncover and bake for 20 minutes or until heated through.
- While baking, make salad!
Apple Dijion Kale Salad
From Budget Bytes.
INGREDIENTS
- 1/3 cup olive oil
- 1/4 cup apple cider vinegar
- 1 clove garlic
- 1 1/2 tbsp dijon mustard
- 1/4 tsp salt
- 1/4 tsp black pepper
- 1 bunch kale
- 1 medium granny smith apple
- 1/4 cup dried cranberries
- 1/2 cup walnut halves
DIRECTIONS
- Tear or cut the kale leaves from the stems. Cut the leaves into 2-inch squares and then rinse well under cool water (in a colander). Allow the kale to drain as you prepare the rest of the salad.
- In a bowl combine the olive oil, apple cider vinegar, dijon mustard, clove of garlic, salt, and pepper. Using a hand blender, blend until the garlic is minced and the dressing is smooth.
- Wash the apple and chop it into chunks. Roughly chop the walnut halves. Make sure the kale is as dry as possible and then combine it in a large bowl with the apples, walnuts, and dried cranberries. Pour the dressing on top and toss to coat.
Step-by-steps
- Preheat oven to 350°F
- In large pan, heat half of the oil over medium-high heat; cook beef, breaking up with spoon, for 8 minutes or until no longer pink. Drain fat, and remove meat from pan. Set aside.
- Trim your Swiss chard, removing the tips of the stems and any brown spots. Rinse the chard and cut/tear into quarters. Steam the chard until tender, about 10 minutes. Place steamed chard onto a tea towel to dry a bit.

Swiss chard is one of my favourites. Also wonderful steamed and sautéed with butter and garlic.
- Add remaining oil to pan; sauté the onions and garlic for 5 minutes. Add basil, oregano, hot pepper flakes, salt, pepper, tomatoes, and tomato sauce. Return beef to pan; bring to boil. Reduce heat and simmer, stirring often, for 20 to 25 minutes or until thickened.

Sautéed onions and garlic, with spices added!
- Meanwhile, in large pot of boiling salted water, cook pasta according to package directions until tender but firm. Drain and rinse under cold water; drain well and place on damp tea towel.

Jumbo shell is like the mama of the regular shells. Awww so cute.
- Filling: Meanwhile, in a large bowl, combine steamed Swiss chard, ricotta, Parmesan, mozzarella, parsley, onions, eggs, basil, nutmeg, and pepper.

Stuffing for shells!
- Pour half of the tomato-meat sauce into 13 x 9-inch casserole dish. Spoon heaping tablespoons of filling into each pasta shell. Arrange snugly, stuffed side up, in dish. Spoon remaining sauce over top; sprinkle with mozzarella and Parmesan cheeses. Cover with foil.

Stuffing the shells. They looked nice and neat until I had to start shoving them into places to finishing the filling batch.
- Bake covered for 30 minutes. Uncover and bake for 20 minutes or until heated through.

Pre-oven layer confirmation. Niiiiice.
- While baking, make salad!

Salad! I have no idea why this picture is sideways… oh well.
Curry Chicken Salad– tart, creamy,crunchy, delicious
I need to apologize for my disappearance lately. I’d love to blame it on the romanticism of married life, but truly, I have been insanely busy, commuting out to New Westminister for audiobook recording, researching for my thesis, and trying to keep up with the ridiculous number of professional commitments I’ve signed up for. It’s all very exciting but it is also exhausting and terribly it is Not Crocker that has suffered… oh and my husband, because I’ve barely cooked. But! BUT! Today I made chicken salad. As a meal. AS A MEAL. And it was glorious and easy. I’ve always thought of chicken salad as something you make with left over chicken, but cooking chicken fresh, for the purpose of chicken salad is AWESOME. Recommend, 10/10, will cook again. I got the recipe base from one of my favourite blogs, Budget Bytes, and I adjusted it just for my own tastes and personal preferences! I am going to try this recipe with a marinade on my chicken one day and report back!

Curry Chicken Salad
Lightly adjusted from here.
Ingredients
- 2 chicken breast halves
- salt & pepper to taste
- 1/2 tsp ground ginger
- 3 stalks of celery
- 4 green onions
- 1 yellow or red pepper (green is cool too but then you have a really green dish)
- 1/2 cup sliced almonds
- 1 tart green apple (I used Granny Smith)
- 1/2 cup dried cranberries
Dressing
- 1/4 cup mayonnaise (make your own!)
- 1/3 cup plain greek yogurt
- 1 1/4 tsp lime juice (or lemon)
- 1 1/2 tsp curry powder
- 1/2 tsp salt
- 1/4 tsp black pepper
Directions
- Season both sides of the chicken breasts with a light sprinkle of salt, pepper, and ground ginger. Cook the chicken breast on a grill, I used our counter-top one, or in a skillet until cooked through. Refrigerate the cooked chicken breast while you prepare the rest of the salad.
- Slice the green onions, and chop the apple, pepper, and celery into small pieces. For the apple, I quartered it, cut the quarters into thirds and sliced those thirds into small chunks. Put the green onion, celery, apple, sliced almonds, and dried cranberries in a large bowl, sprinkle with a little lime juice to prevent the apples from browning.
- In a small bowl, stir together the mayonnaise, yogurt, lime juice, curry powder, salt, and pepper in a small bowl. Taste the mixture to see if you prefer more curry powder.
- Take the cooled chicken out. Cut the chicken into small cubes and place it in the large bowl with the rest of the chopped ingredients. Stir to combine. Pour the dressing over top and stir to coat.
- Eat. I am definitely making a sandwich with this sometime. Soooo tasty. Oh yes, and it may or may not be accompanied by a fruity beer.

Fresh mayo in the tall cup, veggies and spices, ready to go!

Okay, okay, so the recipe says to pour the dressing onto the veggies, but I just chopped and plopped the veggies onto my dressing. Works either way!

Scrumptious